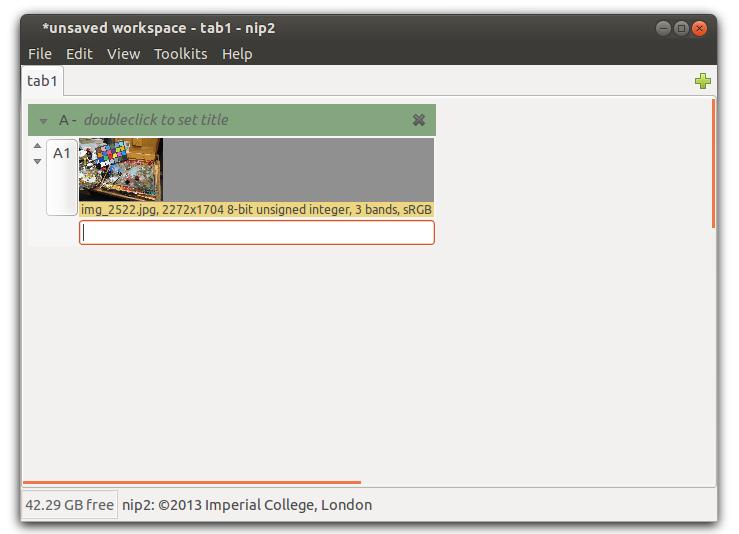
Figure 2.1: After loading an image
Start up nip2. You should see something like Figure 1.1 (the exact look might be different on your system).
The menus at the top of the window are very ordinary, except for the Toolkits menu which contains all of the image processing operations. The main part of the window shows a workspace. Workspaces are split into tabs (across the top) and each tab is made of a set of columns. The current column, where new objects appear, has a dark green bar across the top.
Click on File / Open to get a file dialog and load up an image. nip2 can load most image formats, try it and see. Check the Pin up box to have the dialog remain after you press OK. You can also drag files from the desktop or from your file manager.
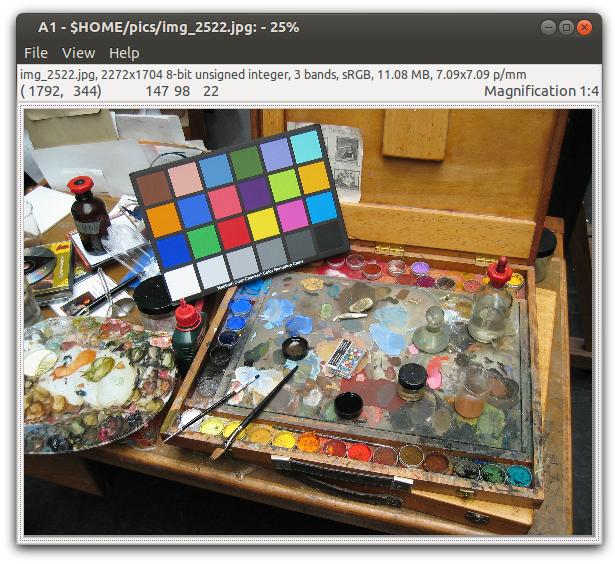
After you’ve loaded an image, nip2 should look like Figure 2.1. Double click on the thumbnail to open an image view window. Alternatively, select Edit from the right-button menu on the thumbnail. See Figure 2.2.
As well as the standard keymappings, nip2 has extra shortcuts for navigating images, see Table 2.1. Use the View / Toolbar menu to turn on other features. You can have a status bar (shows image properties, mouse position and pixel value), a display control bar (lets you change scale and offset for display pixels, click on the arrow on the left for a useful extra menu), a paint bar and some rulers.
| Keys in image display widget | Action |
| i, + | Zoom in on mouse pointer |
| o, - | Zoom out |
| Cursor up/down/left/right | Scroll a small amount in direction |
| Shift and cursor up/down/left/right | Scroll a screenful in direction |
| Ctrl and cursor up/down/left/right | Scroll to edge of image |
| Middle mouse drag | Pan image |
| Mouse wheel | Scroll up/down |
| Shift and mouse wheel | Scroll left/right |
| Ctrl and mouse wheel | Zoom in/out |
| 0 (zero key) | Zoom out to fit image to window |
| 1, 2, 4, 8 | Set magnification to 1, 2, 4 or 8 |
| Ctrl and 2, 4, 8 | Set zoom out factor to 2, 4 or 8 |
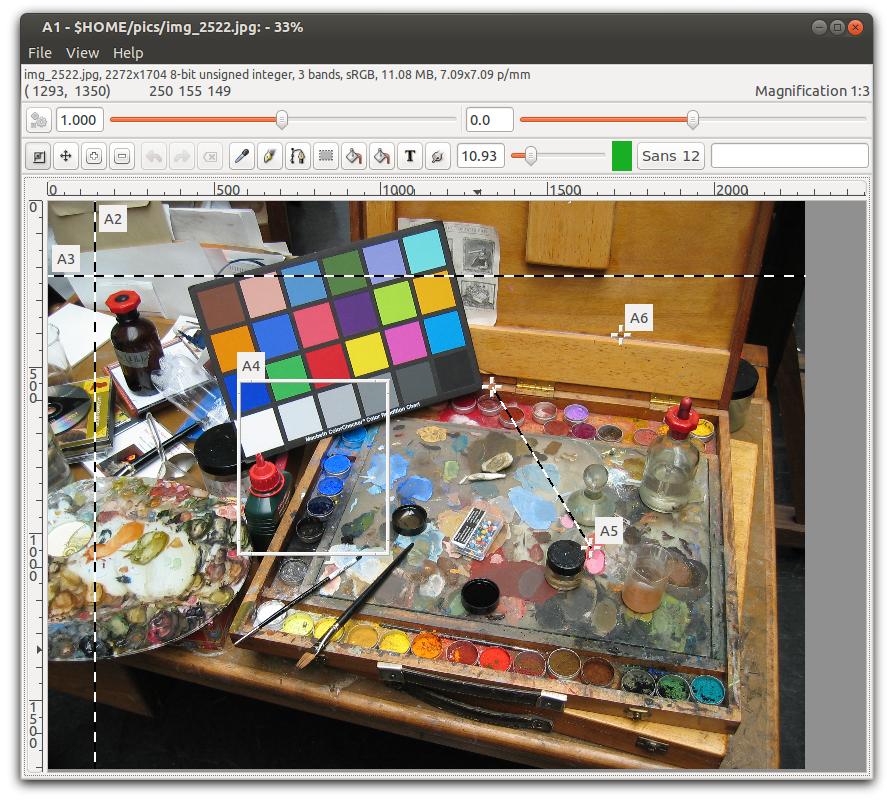
You can mark things on an image. Hold down Ctrl and drag down and right with the left mouse button to mark a region. Ctrl-left-click to mark a point. Drag up and left to mark an arrow (two points connected by a line). Drag from the rulers to mark guides. Right-click on a label to get a menu which you can use to remove or edit one of these things. Left drag on a label to move the things around, left-drag on the edges or corners to resize. Figure 2.3 shows the same image with stuff marked on it.
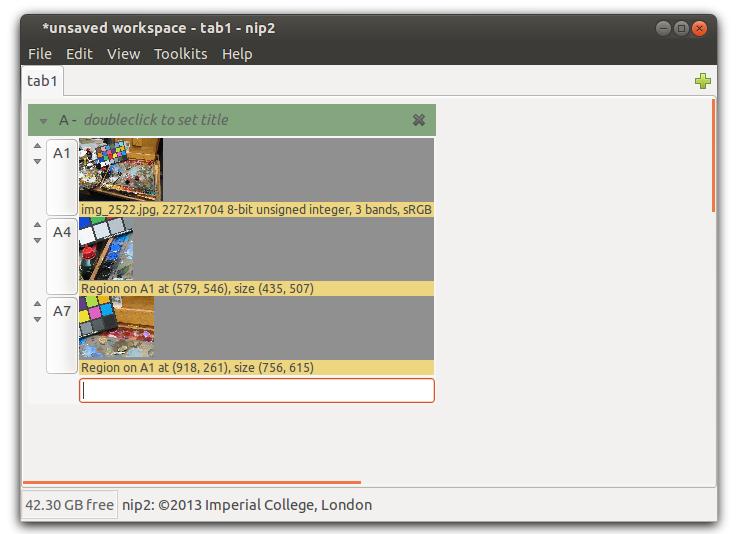
Clean up any messing about and leave two regions on your image. The main window should now look something like Figure 2.4.
There are three rows visible here, A1, A4 and A7. Each row has (from left to right) a pair of up/down arrows (these indicate that the row contains sub-rows: click on the down arrow several times to open the row up and see inside), the name button (left-click to select, Shift-left-click to extend-select, Ctrl-left-click to toggle select, click on the workspace background to unselect everything, left-drag on the name button to reorder items within the column, right-click to get a context menu) and the thumbnail image.
Left-click on the name button of one of these images to select it, and then click on Toolkits / Image / Transform / Rotate / Free (alternatively, if nothing is selected when you click on one of the toolkit menus, nip2 will apply the operation to the bottom object in the current column). A new row will appear representing the rotation operation. Drag the slider to rotate the image (or type an angle in degrees into the box to the left of the slider and press Return). Pick an interpolation type from the option menu and zoom in on some pixels to check the result. See Figure 2.5.
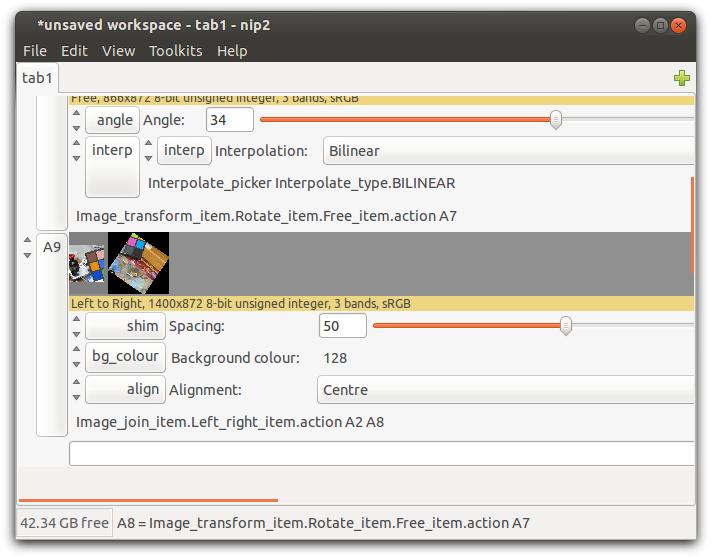
The same thing works for image processing operations that take two arguments. Left-click on one of your original regions, Ctrl-left-click on the rotated image (the box at the left of the main window status bar says what’s selected and in what order), and click on Toolkits / Image / Join / Left to Right. A new row appears representing the join operation.
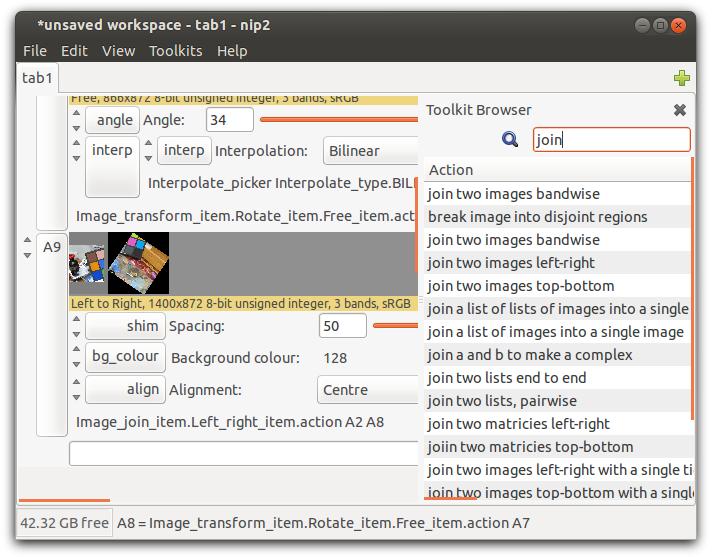
Click on Background Colour, type in 128 and press Return. Drag the shim slider to 50 (or type 50 into the box just to the left of the slider and press Return). See Figure 2.6.
The Toolkits menu is large and can be slow and annoying to find things in, so nip2 has several shortcuts. First, you can tear-off menus by clicking on the dotted line at the top. If you’re going to be using one of the sub-menus repeatedly this can save a lot of clicking. Next, you can set keyboard shortcuts for menu items by moving the mouse pointer over the item and pressing the key combination you want to set.
Some systems won’t let you edit menu shortcuts by default. For example, on GNOME, you need to enable this in System / Preferences / Menus & Toolbars.
Finally, there is a toolkit browser: this shows the same set of items, but in an easier-to-browse way. Click on View / Toolkit Browser and the browse side-panel will appear, see Figure 2.7. It shows all of the items as a single long list. Type into the search box at the top to only show items which match. Double-click (or press Return) on an item to activate it. Scroll to the right to see what arguments the item needs and what menu it appears in.
The box at the bottom of each column is for entering new expressions. You can type stuff here, and nip2 will make a new row for each item you enter. Try typing 2 + 2 and pressing Return. The syntax is (almost, with a few small differences) the same as the C programming language. See §6.6 for a list of the differences. Try multiplying the joined images by a small amount (eg. type something like A9 * 1.2 and press Return). Normally nip2 will pick names for new objects for you (like A1), but you can set a name yourself if you like. Try entering fred = 12.
Click the down button once on your brightened image and left-click on the area just below the thumbnail. You should see the stuff you typed to make that row. You can edit it to be anything else, press Return and nip2 will recalculate. Try going back to your original image (the one you loaded from a file), open an image view window, and try dragging one of the regions. You can change any of the sliders in the rotate or the join rows as well.
Right-click on a thumbnail for a useful menu. Use Save As to save an image to a file. Use Replace From File to change the image in a row (and recalculate the rest of your workspace, very handy). Use Header to view an image’s metadata.
You can also edit the insides of objects. Click the down button next to one of your regions until the width and height rows appear, click on width and type height * 2. Now open the image window the region is defined on and try to resize it: you’ll find that the width of the region is fixed, but that if you change the height, the width changes with it. This is a very general property of classes in nip2: you can use it to join objects together in complex ways, and to modify the behaviour of interactive objects.
Right click on a column title bar to get a useful menu. Click on File / New / Column make another column (handy for organising a workspace). If you drag from an image thumbnail on to the workspace background, nip2 will make a new column for you. You can drop thumbnails on to other thumbnails to make links.
There’s a useful right-click menu on the tab name. Duplicating tabs is a very easy way to try something out: make a copy of your tab, try changing something, if it doesn’t work out, just delete your new tab and go back to where you were. You can drag tabs between workspaces, and you can drag a tab to the desktop to make a new workspace. You can make references between tabs with thetab name and a dot, for example tab1.A1. You can save columns, tabs or workspaces to workspace files, then merge them back into a colum, as part of a tab, or as a new tab.
If nip2 falls over (I do hope it doesn’t), you can usually get your work back by restarting nip2 and clicking on File / Search for Workspace Backups. There are a lot of preferences (perhaps too many), see Appendix A.
There is a lot of stuff in the Toolkits menus, but they do almost all have tooltips. If you let your mouse hover over a menu item for a moment you should get some helpful text. The toolkit menu is organised by object type. If you want to do something to a matrix, look in the Toolkits / Matrix menu. The exception is Toolkits / Tasks which repeats many of the regular toolkit items, but groups them by typical tasks instead.
Operations can work on groups as well as on single images, so you can batch things up. If you save a group of images, nip2 will number each image sequentially for you. You can use Edit / Duplicate to make copies of objects. If you select lots of objects and duplicate them, nip2 will (fairly intelligently) rename everything for you so it all still works.