Figure 2.11: Programming Fred
This section sprints through a bit of nip2 programming, see §6 for full details and a more formal definition of the language.
The insides of nip2 are built with nip2’s own programming language. It’s a pure lazy functional language with classes. It’s C’s expression syntax (more or less) plus approximately Miranda/Haskell function syntax, plus some basic class stuff. nip2’s main window is a class browser for this programming language.
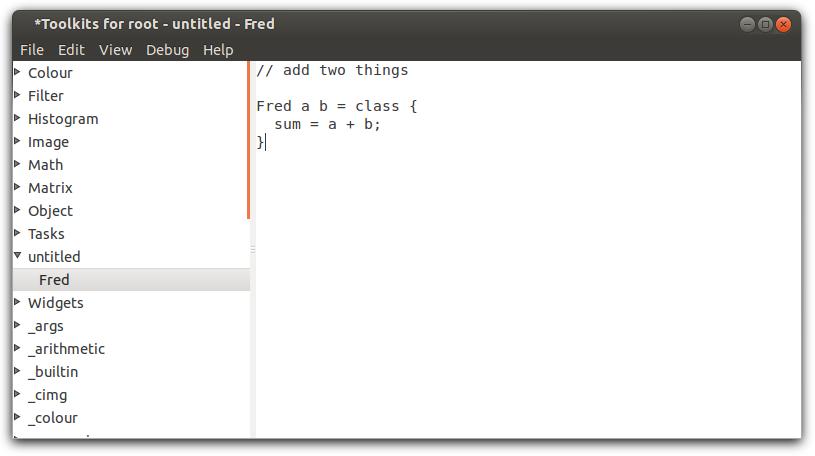
Click on Toolkits / Edit Toolkits in nip2’s main window to pop up the programming window (see §4.4 for details on all the bits in the window), then in the edit area there type:
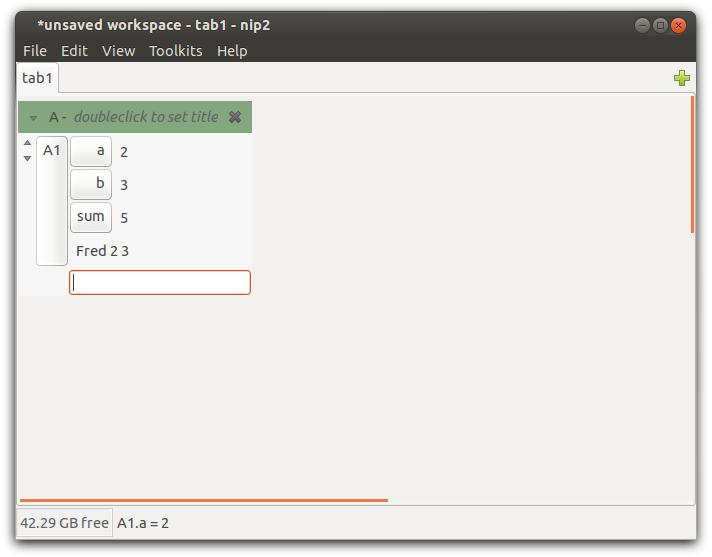
This defines a class called Fred whose constructor takes two arguments, a and b. There’s one member, called sum, which is a and b added together.
In the program window, click File / Process. This makes nip2 read what you typed, parse it, compile it and update itself. The program window should now look like Figure 2.11.
If you look back at the main nip2 window, a new menu will have appeared under Toolkits called untitled. If you click on that, there will be a menu item called Fred. Let your mouse linger, and you’ll see a tooltip too.
In the main window, type Fred 2 3 into the box at the bottom of the current column. Press Return and nip2 will make a Fred for you. Click on the down arrow to the left of your new Fred once to see the members of Fred (just sum in this case), click again to see the class parameters too. The main window should look like Figure 2.12.
Click to the right of b, type in a new value and press Return. The sum member should update. nip2 keeps track of dependencies between rows, but it also tracks dependencies inside rows, both ones that come from the class, and ones created by any edits you do to the class instance after creating it. You won’t see it in a simple example, but nip2 also discovers and tracks dependencies which can arise at run time. Click on the text just to the right of the b button again, type a and press Return. Now edit a: press Return and both b and sum will update.
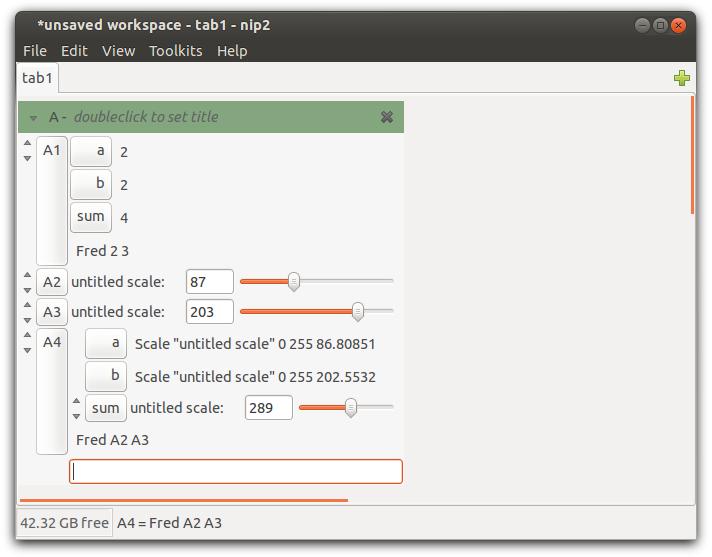
You can use Fred to add any two things together. Click on Toolkits / Widgets / Scale to make a scale widget, press Ctrl-U (the keyboard shortcut for Edit / Duplicate) to duplicate it, and finally click on Toolkits / untitled / Fred. Open up the new Fred and try dragging some of the scales around. The main window will look like Figure 2.13.
The scales are classes too (instances of Scale). You can open them up and do strange things with them as well. Open up one of the scales you made (eg. A2 in Figure 2.13) and change the from parameter to be A3.value. Now try dragging the sliders again.
Try dragging the sum slider. Now go back and drag one of the original sliders. You’ll see that sum no longer updates, it’s stuck at the last position you dragged it to. This is because there are now two things affecting the value of sum: the underlying code (the a + b inside Fred), and the position you dragged the slider representing sum to. nip2 has the rule that graphical edits (dragging the slider) override code. To make sum update again, right click on the sum button and select Reset from the pop up menu. Now drag one of the input sliders again, and sum will start updating once more.
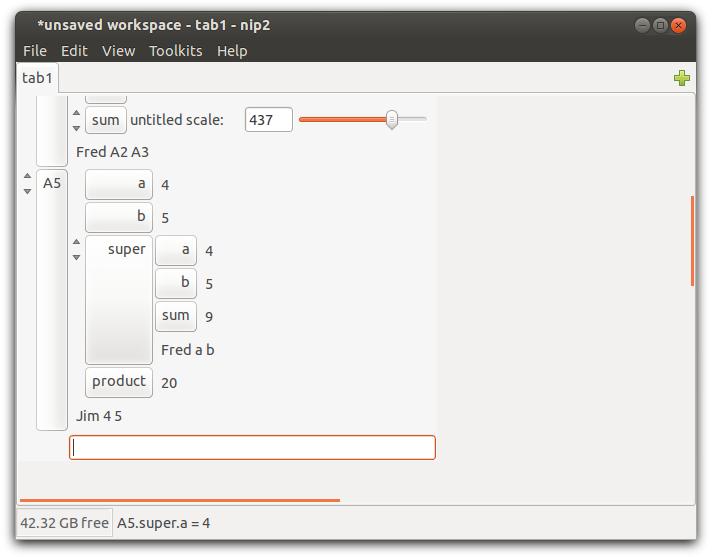
Classes can inherit from other classes. Go back to the program window, click on File / New / Tool to clear the edit window, and type:
This defines a class called Jim which inherits from Fred. Click File / Process, then back in the main window, type Jim 4 5 into the bottom of the column. Click down once to expose the members (just product), click again to expose the parameters as well (a and b), and click a third time to expose the superclass member (which should be an instance of Fred). You can also open up the super member and see inside the Fred that this Jim is using as its superclass. A5 will respond to both product and sum. See Figure 2.14.
nip2 has about 20 different graphical classes like Scale. Whenever a row takes a new value, nip2 checks to see if that value is an instance of one of these special classes, and if it is, it will add a graphical element to the row display which represents that class’s value. It builds the graphical part by looking inside the class for certain members (for example, the scale graphic looks for members called from, to and value). When you change the graphic (maybe by dragging the scale), nip2 rebuilds the class by looking inside for a edit member (eg. Scale_edit) or if that’s not defined, a constructor member (eg. Scale).
You can make your own graphic widgets by subclassing nip2’s built-in ones. By selectively overriding default constructors and adding edit members, you can control how your new widget will behave in expressions, and how it will behave if it’s edited graphically.
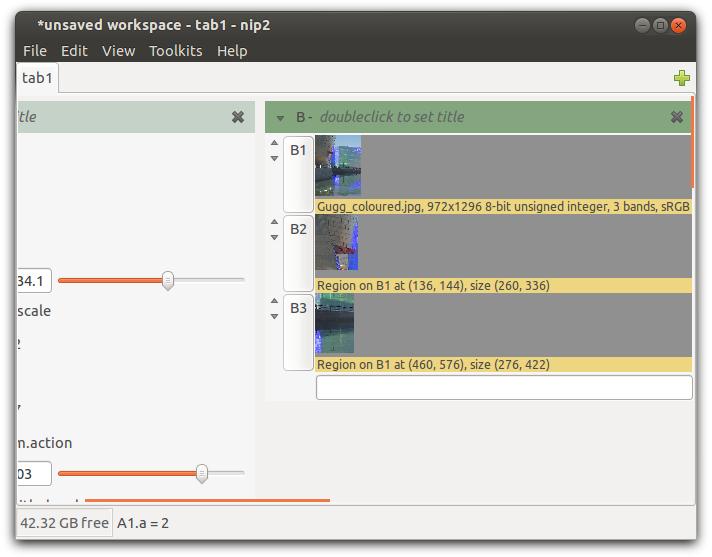
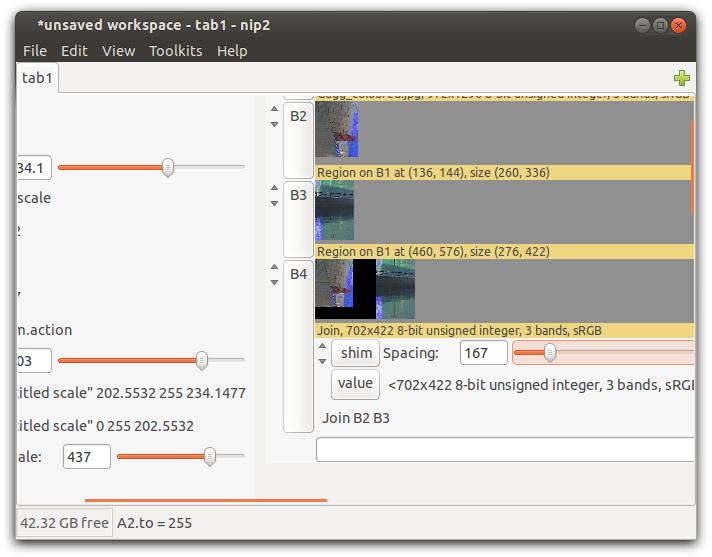
Make a new column, load up an image (use File / Open), open an image viewer (double-click on the thumbnail), drag out two regions on it (hold down Ctrl and the left mouse button and drag down and right). Your main window should look like Figure 2.15.
im_insert is a VIPS operation that puts one image inside another at an (x, y) position. VIPS operations work on VIPS images. The value member of an Image or Region is the VIPS image that underlies the nip2 row.
You can use im_insert to make a thing to join two images together. Back in the program window, click on File / New / Tool and enter:
Click File / Process. This defines a class Join which subclasses the Image graphic.
Now select your two regions (click on the first one, shift-click on the second) and click on Toolkits / untitled / Join. Alternatively, just click Join and it’ll be given the borrom two items in the column. A new Join row will appear. Open it up and drag the slider to set the spacing between the two joined images. Go back to the image viewer for the image file you loaded and try dragging one of the regions. Figure 2.16 shows this class in action. The thing in Toolkits / Image / Join / Left to Right is just a slightly fancier version of this.
You can change how the graphic widgets behave by subclassing them. Try:
This defines a new scale class called Scale_int which can only take integer values. The Scale = Scale_int; line is Scale_int overriding Scale’s constructor, so that a Scale_int stays a Scale_int when you drag. Because there’s a local called Scale, Scale_int needs to use scope.Scale to refer to the superclass.
Here’s a version of Mark which can only be dragged in a circle. You pass it an image to display on, an xy centre position, a radius and a start angle.